


Here’s another tutorial for you boys and girls. This time I’ll teach you how to create a fairly realistic 6-blade camera iris diaphragm. I initially wrote this intending to submit it to psdtuts.com (which I did). However, it probably did not pass psdtuts.com’s qualifications since it never got posted there since I submitted it more than two months ago.
Anyway, instead of letting it go to waste, I’m posting this here for everyone interested to read and follow.
But before anything else, I just thought I'd share with you about this amazing video course I accidentally came across recently. The car illustrations are just amazing! Watch the video below.
It's a paid tutorial though. But if you're interested, click on this link.
Moving forward...
For those of you who are familiar with the inner components of a camera (may it be a still camera or a video camera), you probably know what an iris diaphragm is. For all the others, in a nutshell, an iris diaphragm is the part of the camera, or more specifically, the lens construction that controls the amount of light that gets to the film/sensor when the shutter button is pressed.
Seeing the final product of this tutorial, some of you will probably be reminded of James Bond films. With some of you probably agreeing silently in front of your monitors, I’d like to point out that the one you see in the intros of James Bond films is actually the inside of a gun barrel which has spiral grooves carved out of it to make bullets spin. So, with that and this looking quite similar, by doing some modifications to this tutorial, you’ll be able to produce a gun barrel interior also.
I have formatted this to be a 1024 pixel by 768 pixel wallpaper.
Before we proceed to the step-by-step guide, I’d like to mention first that we will be using two canvases for this. One will be a temporary one wherein we will create an element which we will be using on the other canvas for our final wallpaper.
So here we go.
Step 1
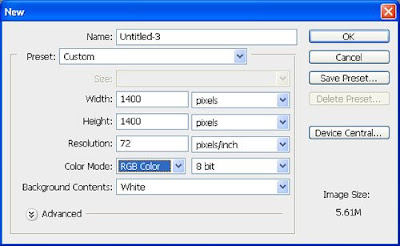
We start with our “temporary” canvas first. For this, create a new canvas (Ctrl+N), make it 1400 pixels by 1400 pixels at 72 dpi with a white background.
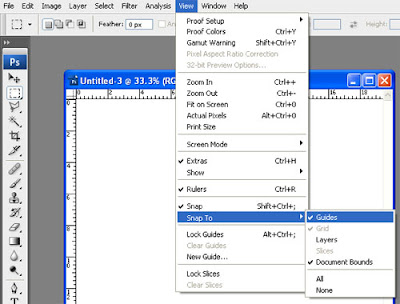
Make sure you have “Snap to Guides” turned on. To do this, go to “View” > “Snap To” and see if “Guides” is checked. If not, click on it.
Step 2
Now, press Ctrl+A to select the entire canvas. Drag a vertical guide until it snaps to the center of the canvas. Likewise, drag a horizontal guide ‘til it snaps to the center.

Deselect (Ctrl+D)
Step 3
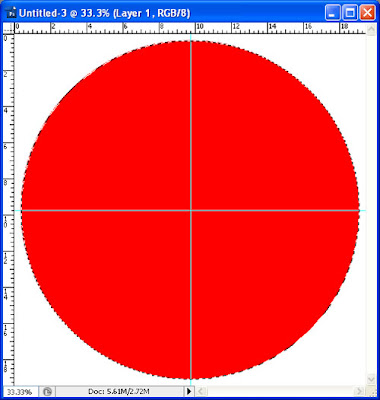
Create a new layer on top of the background layer. There’s no need to name/rename the layer, by the way.
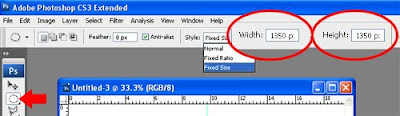
Using the elliptical marquee tool, create a circular selection with a diameter of 1350 px. To be accurate with this, after clicking on the “Elliptical Marquee Tool” on the toolbar, click on the “Style” dropdown menu and click on “Fixed Size”. Key in “1350 px” for both the width and height.
After that is set, click on the canvas to create the selection. With the “Elliptical Marquee Tool” (or any marquee/selection tool) the active tool, click on and drag the selection until it snaps to the center of the canvas.
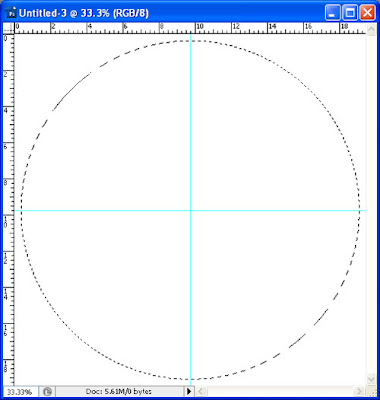
With “Layer 1” the active layer, fill the selection with any color other than black and white. Whatever color you choose will not matter as we will apply a gradient to it later on.
Deselect (Ctrl+D)
Note: You may also use the “Ellipse Tool” to create the black circle, by the way.
Step 4
Now, change to the “Rectangular Marquee Tool”. Make sure that the “Style” is set to “Normal”.
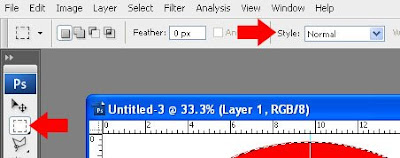
Create a selection that’s big enough to enclose the lower half of the circle and press Ctrl+C to copy the selected portion of the circle.
You can now forget about the canvas you used to create the circle in. It’s all up to you if you decide to just minimize the canvas or discard/close it altogether. But, I would advise you to just minimize it and keep it in the background so that you can go back to it if something goes wrong.
Step 5
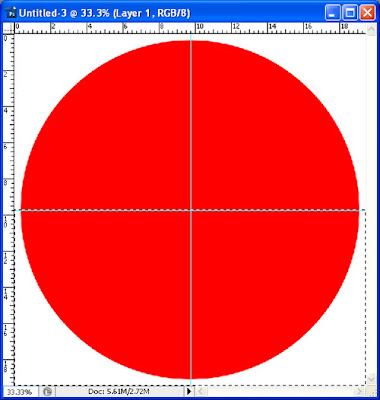
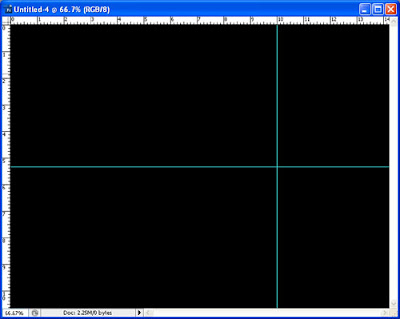
Now, set your background color to black and create a new canvas. Make it 1024 pixels by 768 pixels at 72 dpi. Set the “Background Contents” to “Background Color”.

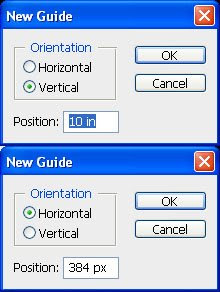
Put a vertical guide at 10 inches, and a horizontal guide at 384 px.
Step 6
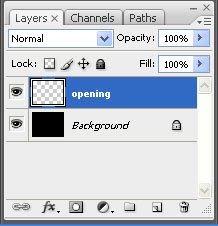
Create a new layer on top of the background layer and name it “opening”.
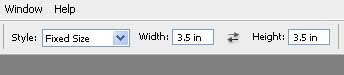
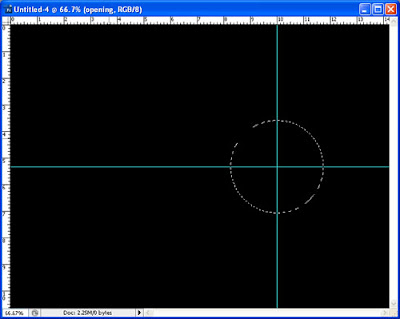
Using the “Eliptical Marquee Tool”, create a circular selection with a diameter of 3.5 inches. Again, to make this accurate, click on the “Styles” dropdown menu and key in “3.5 in” for both width and height.
Click on the canvas to effect the selection. Drag the selection until it snaps to the intersection of the vertical and horizontal guides.
With the “opening” layer the active layer, fill the selection with white (#FFFFFF).
Drag a vertical guide and let it snap to the right edge of the white circle.
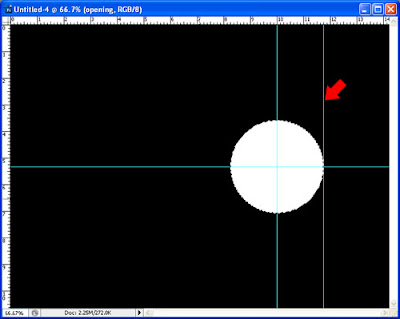
Deselect.
Step 7
Create a new layer in between the “opening” and “background” layers and name it “blades”.
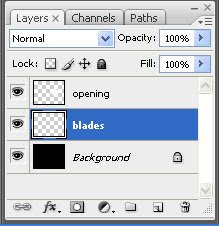
With the “blades” layer active, press Ctrl+V to paste the half circle you copied earlier from the other canvas. If nothing appears, go back to the other canvas and copy it again.
Explanation: The reason why we had to use another canvas to create the half circle is because if we create a selection that’s bigger than the canvas (I’m talking about our main/final canvas here), any part of the selection that goes off to the edges of the canvas will not be rendered/filled when you use the “Paint Bucket Tool” to fill it. This is also the case when using the “Ellipse Tool”.
Move the pasted half circle until its rightmost part snaps to the guide at the right edge of the white circle; and the top part of the half circle to the horizontal guide.
Step 8
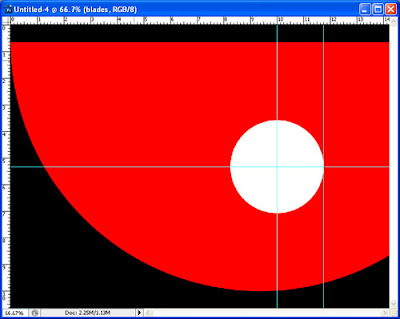
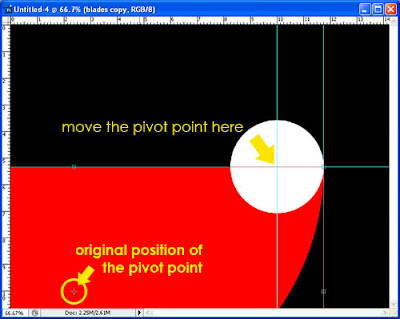
Duplicate the “blades” layer. With the duplicate “blades” layer (“blades copy” layer) active, press Ctrl+T (free transform).
Move the “pivot point” to the exact intersection of the guides at the center of the white circle. To achieve this, you will need to zoom in to the maximum magnification (which is 3200%). You’ll know that the pivot point is already where we need it to be when you see the cross hairs change to pink. By the way, when you are in the “Free Transform” mode, you will not be able to use the “Zoom Tool”, so, to zoom in, you need to use the Ctrl+ “+” shortcut. (To zoom out, it’s Ctrl+ “-”). And to move around the canvas, press and hold the “Space bar” on your keyboard and click and drag the canvas to whichever direction you need to move your view to.
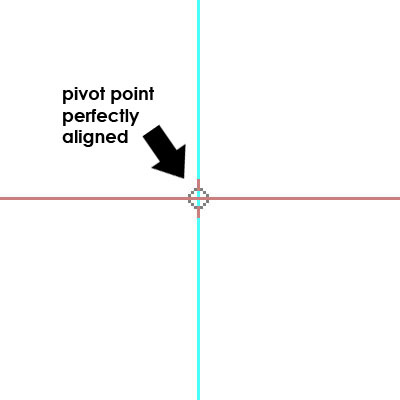
When the “pivot point” is already aligned with the guides’ intersection, rotate it by 60 degrees and apply the transformation/change.

Step 9
Now, go back to full view (Ctrl+0).
Load the selection of the “blades copy” layer by pressing (and holding) the “Ctrl” key and clicking on the thumbnail of the “blades copy” layer in the layers palette.
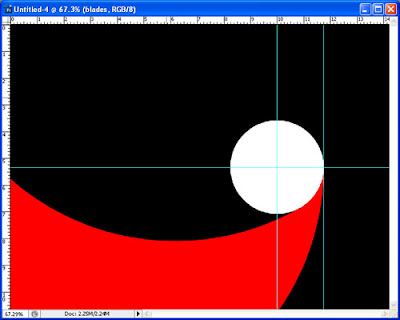
Click on the original “blades” layer to activate it and press “Delete” on your keyboard. Deselect afterwards.
You may now delete the “blades copy” layer.
At this point you should have something like this.
Step 10
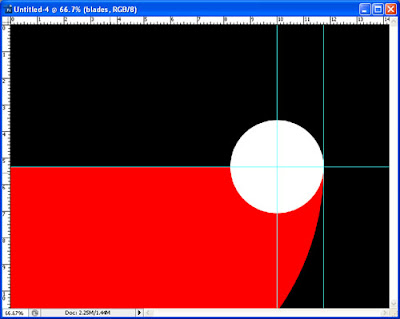
Duplicate the “blades” layer again.
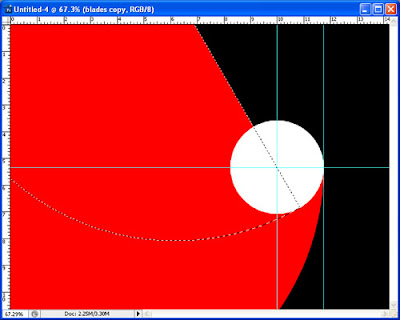
With the “blades copy” layer active, press Ctrl+T, and again, move the “pivot point” to the guide intersection at the center of the white circle. This time, rotate by 180 degrees.

Apply the transformation. At this point you should have something like this.
Merge the “blades” and the “blades copy” layers. To do this, click on the “blades copy” layer, which should be on top of the original “blades” layer, and press Ctrl+E.
Step 11
Duplicate the merged “blades” layer.
With the “blades copy” layer active, press Ctrl+T and rotate by 60 degrees. Apply.

And again, for the last time, duplicate the “blades copy” layer.
Rotate the “blades copy 2” layer by 60 degrees. Apply.
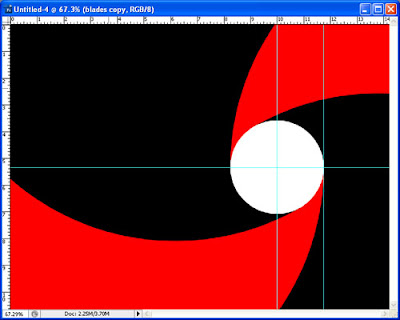
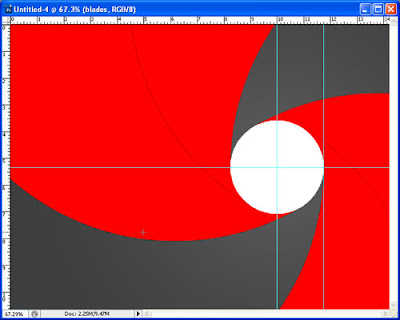
At this point you should have something like this.
Step 12
Double click on any of the blades layers to bring up the “Layer Styles” window. (In this case I used the original “blades” layer.
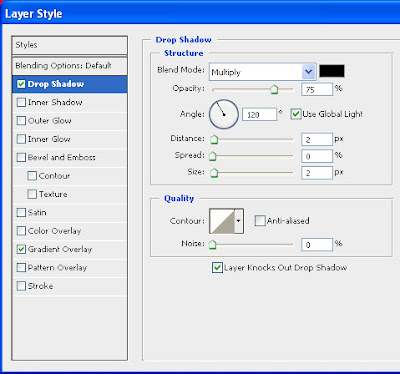
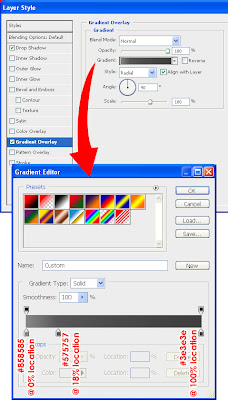
Apply the “Drop Shadow” and “Gradient Overlay” layer styles with settings as shown in the screenshots below. Click “OK” to apply.
By now, you should have something like this:
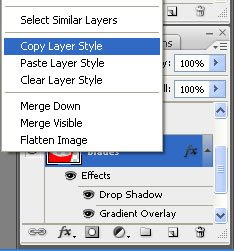
Step 13
Right click on the blades layer you applied the layer styles to and select “Copy Layer Style”.
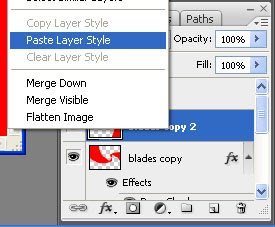
Paste the “Layer Styles” to the other two blades layers by right clicking on them and selecting “Paste Layer Style”.
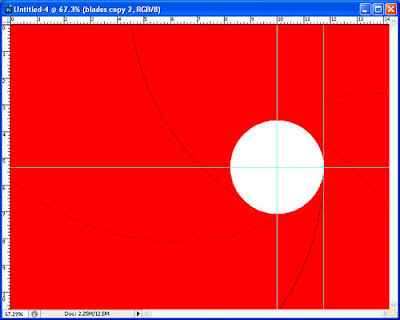
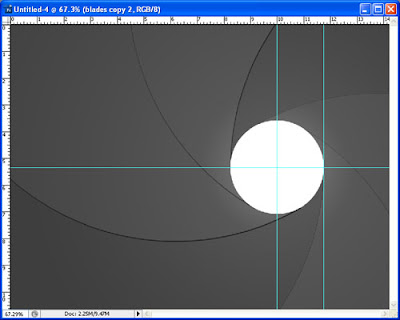
You should have a result like this:
Step 14
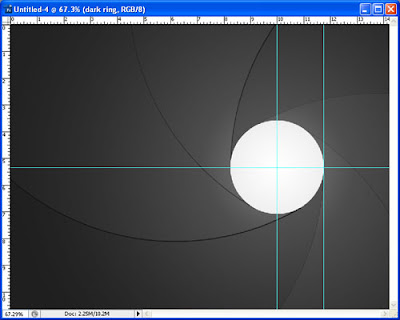
Create a new layer on top of all the other layers and name it “dark ring”.
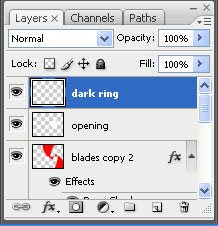
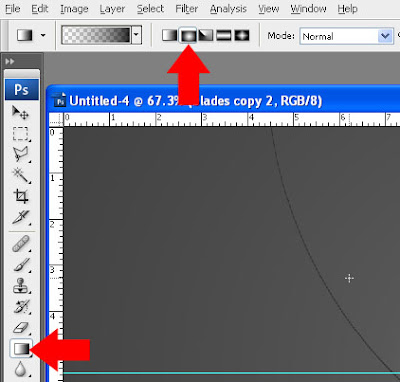
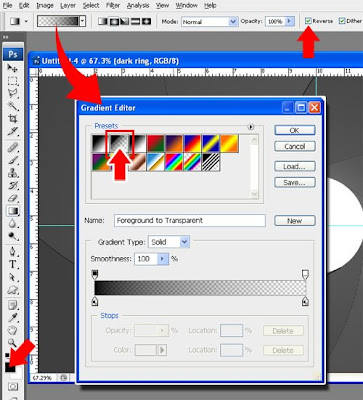
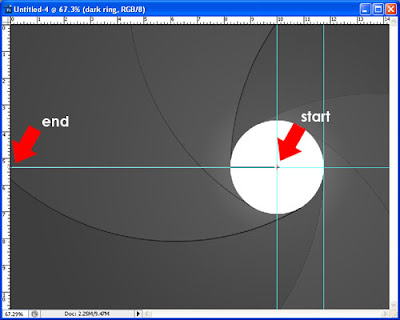
With the “Gradient Tool” set to “Radial Gradient” and the “dark ring” layer the active layer, apply a gradient of transparent to black starting from the center of the white circle to the leftmost edge of the canvas. Note: the easiest way to make the gradient go from transparent to black is to set your “Foreground color” to black then, with the “Gradient Tool” selected, click on the gradient on top of the screen and click on the second gradient style in the “Gradient Editor” dialog box. Then on the “Gradient Tool” options on the top portion of the screen, check “Reverse”.
Set the opacity of the “dark ring” layer to 50%.
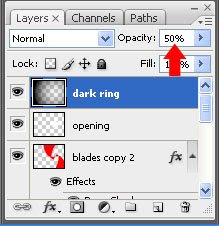
You should now have something like this.
You are done, basically. All you have to do now, should you desire it is to fill the white circle with any image/element you fancy (like what I did below).

Enjoy!
My other Photoshop tutorials:
Gun Barrel Intro from James Bond Movies


Comments:
blog comments powered by Disqus